The Secret to Explosive Growth: Why Optimal Temperatures Matter for Seed Germination
The anticipation of garden season is a feeling every gardener cherishes. Even when winter's chill still grips the air, the arrival of seed packets signals the start of new life indoors. But transforming those tiny seeds into robust seedlings ready for your garden isn't always straightforward. Inconsistent sprouting, slow growth, and even complete germination failure can be frustrating. The good news? Achieving a near 100% germination rate is not only possible but remarkably simple with the right tools: a seedling heat mat and a precise thermometer. These essential instruments help unlock rapid seed sprouting by replicating the naturally warm, consistent soil conditions that seeds crave, ensuring your spring garden gets off to the strongest possible start.
At its core, seed germination is a complex metabolic process. Seeds contain all the necessary genetic information for a new plant, but they need specific environmental cues to "wake up." Chief among these cues is warmth. While ambient room temperature might feel comfortable to us, it's often too cool and fluctuating for optimal seed activation. A seedling heat mat, working in tandem with an accurate thermometer, provides consistent, gentle bottom heat directly to the soil medium. This focused warmth significantly accelerates the metabolic reactions within the seed, signaling it's time to sprout. By maintaining an elevated and stable soil temperature, typically 10°F to 20°F above the surrounding air, you not only improve germination rates dramatically but also significantly reduce the time it takes for those precious seeds to break through the soil. This efficiency translates directly into healthier, earlier starts for your plants, saving you both time and money in the long run.
Setting Up Your Seedling Heat Mat for Flawless Germination
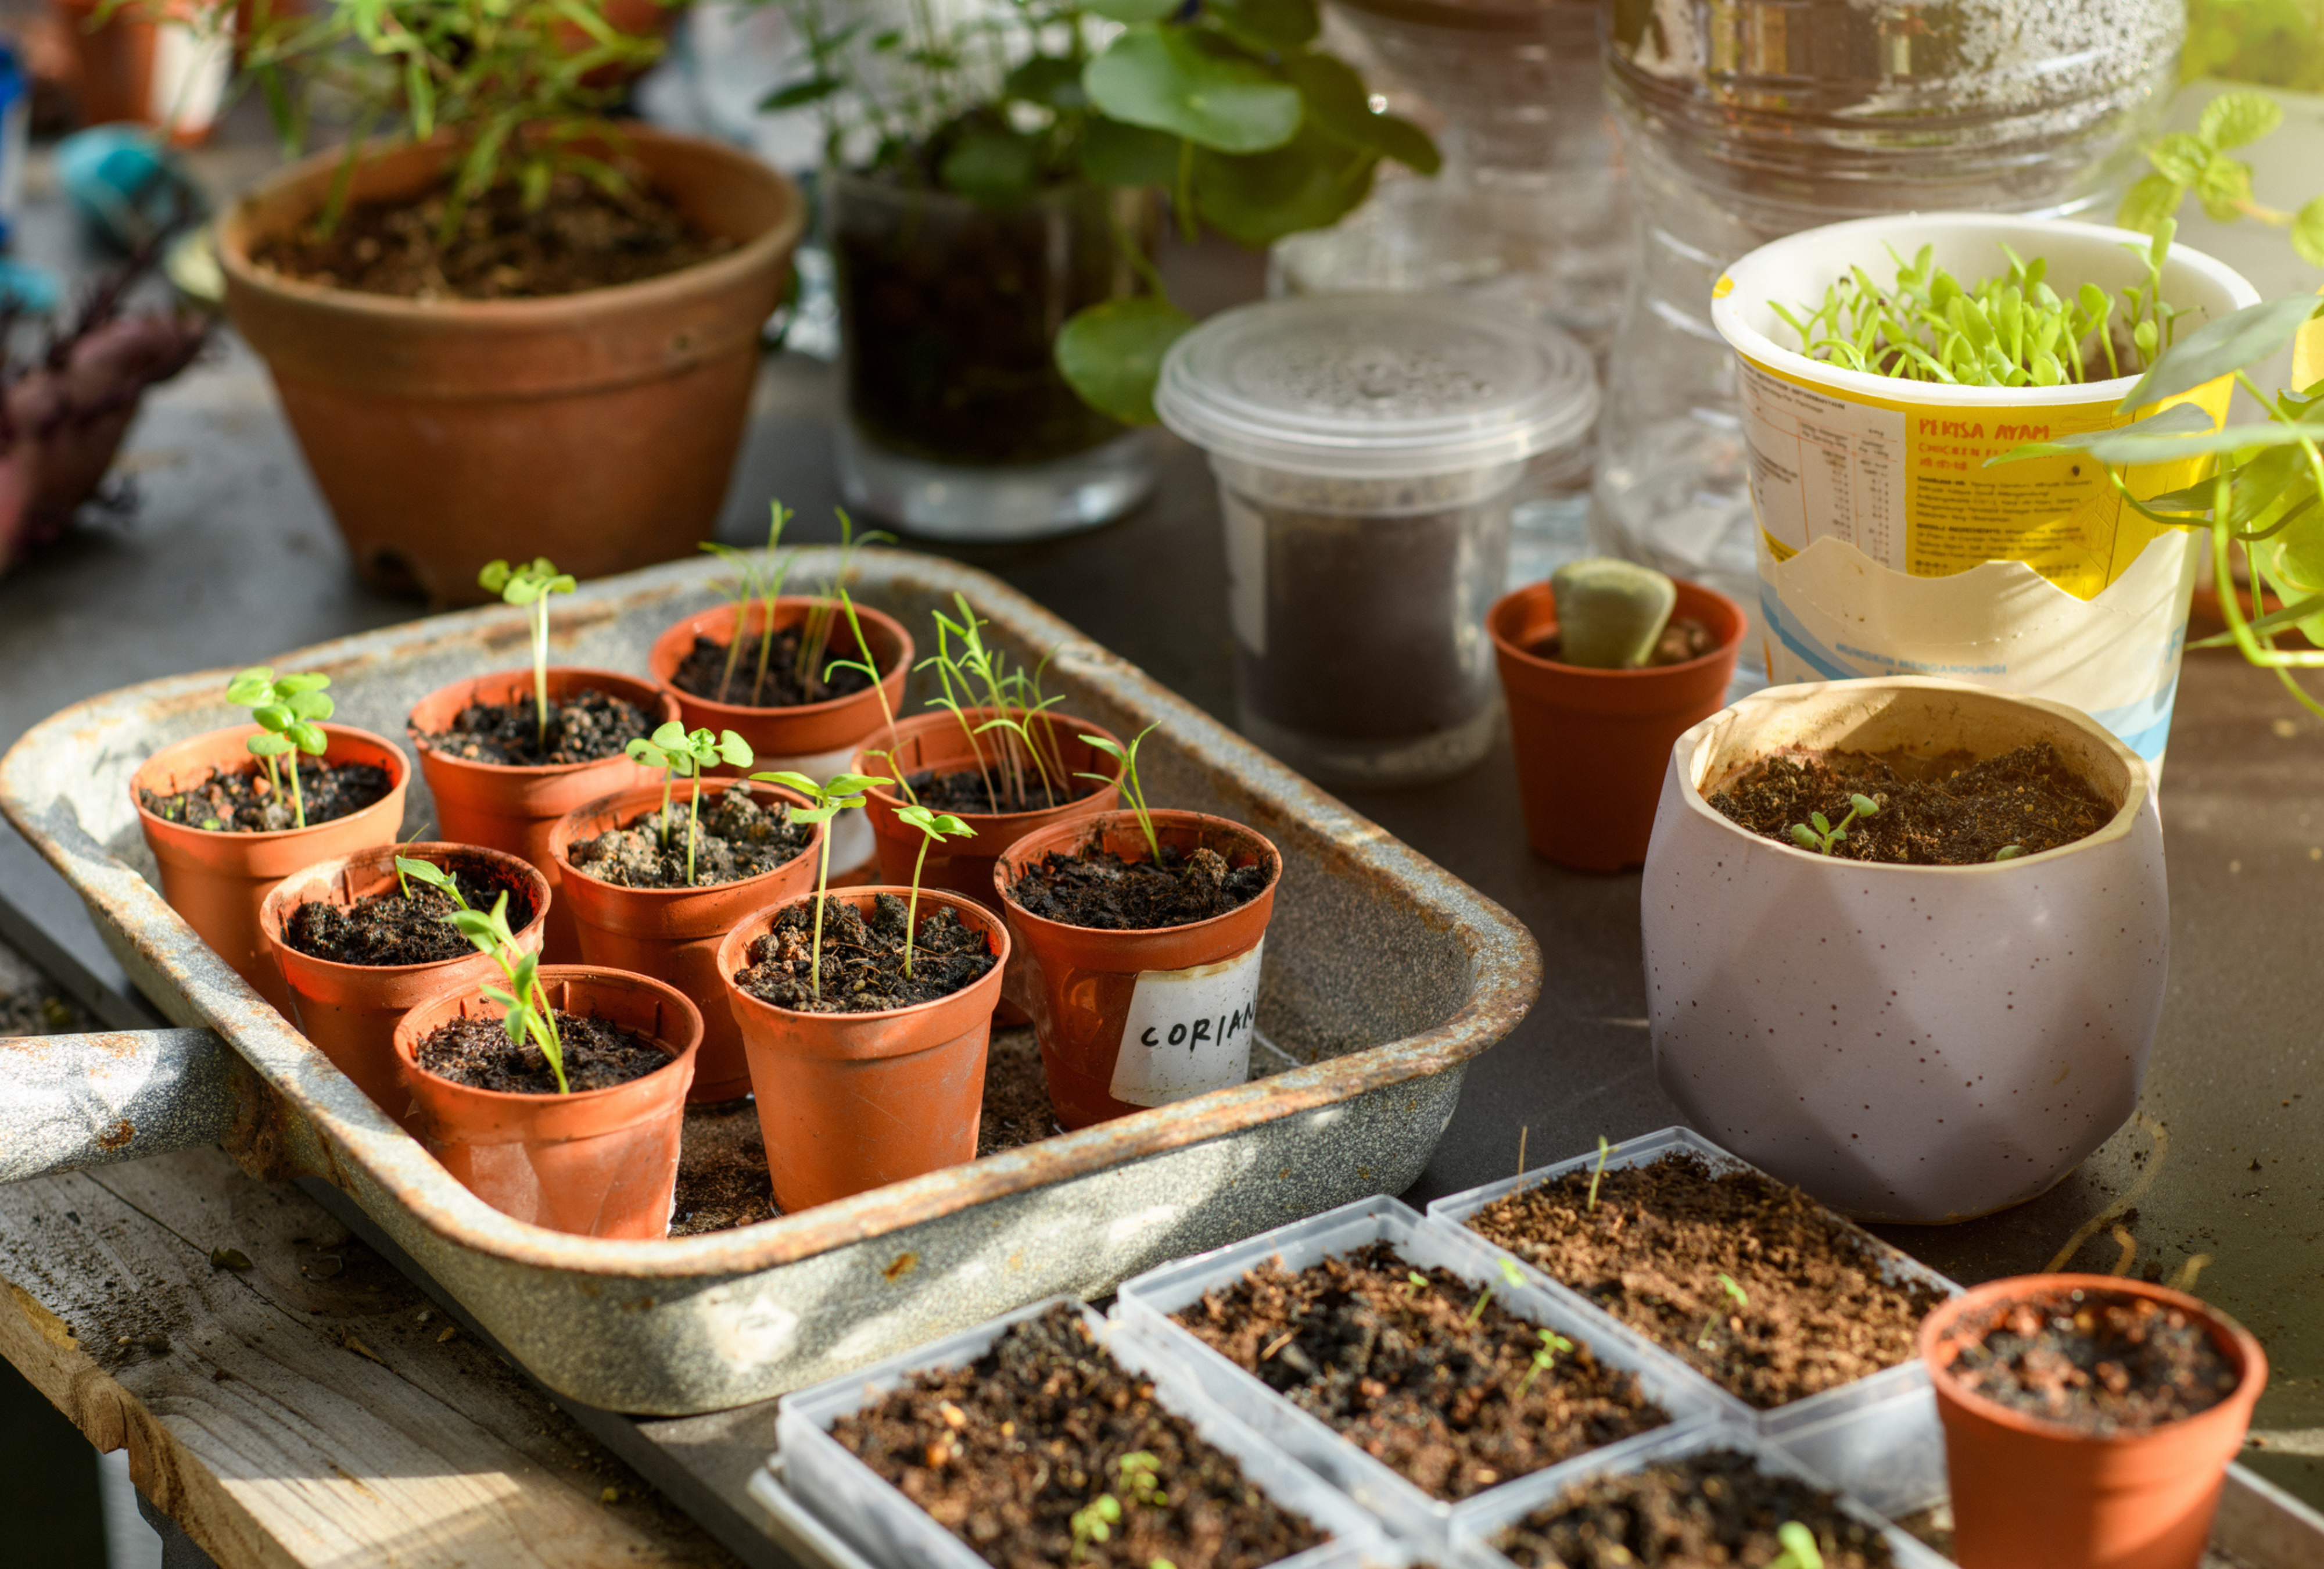
Successfully employing a seedling heat mat goes beyond simply plugging it in. A thoughtful setup ensures both effectiveness and safety, laying the groundwork for thriving seedlings. The heat mat itself is a specialized, waterproof pad designed to distribute warmth evenly from below your seed-starting containers.
Here’s a step-by-step guide to preparing your perfect germination station:
*
Choose a Stable Surface: Place your heat mat on a flat, stable, and dry surface, such as a sturdy countertop or table. Ensure it's away from drafts, cold windows, or other sources of cold that could counteract the mat's warming efforts. Even heat distribution is key to consistent germination across your trays.
*
Prioritize Safety: Given that water is integral to seed starting, it's paramount that your heat mat is rated as water-resistant or, ideally, fully waterproof. Always ensure electrical cords are kept dry and are not submerged in water or placed where they could become a tripping hazard.
*
Position Your Containers: Once the mat is safely in place, set your seed trays or individual pots directly onto its surface. Many gardeners find it beneficial to use a bottom watering tray underneath their seed containers. This not only makes watering easier but also helps to contain any spills.
*
Embrace the Humidity Dome: A clear plastic humidity dome is an indispensable companion to your heat mat. The gentle warmth from the mat naturally increases the evaporation rate from the soil, meaning your seed trays can dry out much faster than expected. The dome traps this moisture and heat, creating a miniature greenhouse effect. This high humidity is crucial for softening seed coats, facilitating germination, and preventing delicate new sprouts from drying out. While the dome minimizes the need for frequent watering, it's still vital to check the soil moisture daily, ensuring it remains consistently moist, never soggy. To prevent fungal issues, remember to vent or lift the dome briefly each day, allowing for essential air exchange.
Combining your heat mat with proper moisture management and a humidity dome creates the ideal microclimate for seed awakening. For more insights on this critical trio, delve into
Essential Tools for Seed Germination: Heat Mat, Thermometer & Humidity.
Mastering Temperature Control: How to Use a Heat Mat and Thermometer for Seed Germination
While a heat mat provides warmth, true mastery of seed germination lies in *precise* temperature control. Many basic heat mats simply raise the soil temperature by a fixed amount above the ambient room temperature, which isn't always ideal for diverse seed types. This is where an external thermostat and a high-quality temperature probe become your greatest allies. These tools empower you to dial in and maintain the exact, consistent soil temperature your seeds need, directly addressing the core of
how to use a heat mat and thermometer for seed germination effectively.
Here’s how to harness this powerful duo:
*
The Role of the Thermostat: An external thermostat acts as the brain of your germination station. It works by cycling power to the heat mat on and off, ensuring the soil temperature never deviates significantly from your set point. This consistent temperature is far more beneficial than fluctuating warmth.
*
Strategic Probe Placement: The temperature probe is the thermostat’s eyes and ears. For accurate readings, it's crucial to place the probe correctly. Gently insert the probe directly into the soil medium, in a representative seed tray or pot. Position it at the seed level—not just resting on the surface or too deep at the bottom of the tray. This ensures you're measuring the actual temperature experienced by your germinating seeds. If you're starting multiple trays, place the probe in the tray that you want to monitor most closely, or in a tray that might be slightly less insulated (e.g., at an edge).
*
Invest in Quality: When it comes to thermometers, skip the cheapest option. As experienced gardeners know, not all soil thermometers are created equal. Investing in a quality, reliable soil thermometer provides accurate readings that you can cross-compare with your thermostat's digital display. This dual-check system gives you confidence that your seeds are experiencing the optimal conditions you intend.
*
Setting the Optimal Temperature: A general range of 65-80°F is often cited for seed germination, but the truly optimal temperature varies significantly by seed type. For many warm-season vegetables like tomatoes, peppers, and eggplants, a consistent 75°F (as we find for our own garden seeds) is often ideal for rapid and robust sprouting. However, cooler-season crops like lettuce, broccoli, or cabbage might prefer temperatures closer to 65-70°F. Always consult your seed packet for specific recommendations. Adjust your thermostat accordingly, knowing you can easily fine-tune it if needed based on the needs of different varieties.
By diligently monitoring and controlling your soil temperature with this setup, you are actively creating the perfect environment for each seed to reach its full potential. For a deeper dive into perfecting this setup, refer to
Achieve 100% Germination: Heat Mat & Thermometer Setup Guide.
Beyond Germination: When to Remove the Heat Mat
While heat mats are indispensable for triggering germination, their purpose is often fulfilled once the seedlings emerge. Understanding when to remove the heat mat is crucial for the continued health and development of your young plants.
Once the majority of your seeds have successfully germinated and the first set of true leaves begins to form, it's generally time to turn off and remove the heat mat. Here's why:
*
Preventing Leggy Growth: Post-germination, most seedlings prefer slightly cooler ambient temperatures than the elevated warmth required for sprouting. Keeping them on a heat mat for too long can encourage leggy, stretched-out growth as they reach for light, making them weaker and more susceptible to damage.
*
Root Development: While warmth is good for initial root activation, prolonged bottom heat can sometimes over-stress developing root systems or dry out the soil too quickly, hindering vigorous growth.
*
Temperature Preference Shift: The energy a plant puts into sprouting is different from the energy it puts into vegetative growth. The cooler, stable temperatures of a well-lit room are often more conducive to healthy foliage and stem development after the initial germination phase.
If possible, gradually reduce the heat over a day or two rather than an abrupt change, although direct removal is often acceptable once sprouts are clearly established. After removing the heat mat, ensure your seedlings have access to adequate light – either from a bright window or, ideally, under grow lights – to continue their strong growth journey.
Conclusion: Cultivating Success with Controlled Warmth
Achieving stellar seed germination rates doesn't have to be a gamble. By understanding and implementing the principles of optimal temperature control using a quality heat mat and an accurate thermometer, you gain a powerful advantage in your gardening endeavors. From the initial setup on a stable surface, through the critical role of humidity domes, to the precise temperature regulation enabled by a thermostat and probe, each step contributes to a highly efficient and successful sprouting process.
Investing in these tools and mastering their use translates directly into faster, more consistent germination, leading to stronger, healthier seedlings that are better prepared for transplanting into your garden. Embrace these techniques, and watch your garden flourish from the very first sprout, setting the stage for an abundant and rewarding growing season.